|
Return
 Tutorial: Animating a dynamic tank tread Tutorial: Animating a dynamic tank tread
Author: Keith Legg
Email:
URL: http://www.perihelionvfx.com/
Level: Beginner to Intermediate
Description: Setup a rotating tank tread effect that conforms both to a path animation curve and the ground it rolls over.
Need Background: It is assumed that the first tutorial has been completed so that the user is familiar with basic mel scripting like loops, selection lists, and using the script editor.
In the process of learning Houdini, another 3D application, I came across a very cool animation of a tank tread rolling over terrain at:http://odforce.net/images/gallery/crawler.mpg
Being the self described pundit that I am, I had to figure out how to get Maya to do the same thing. It appears,in the movie, that the animators are simulating a dynamic bounce on the tread which could be accomplished with springs or expressions. But, for our purposes,we will keep this tutorial as simple as possible. One can find additional information and tutorial about setting up dynamics in Maya at: http://www.highend3d.com/maya/tutorials/dyncon/
I would recommend, when undertaking any new Maya project, to do an internet search for similar projects. This will give you an idea of how others do it and will usually save you some time in the long run. I did a quick search of Goggle for "MAYA TANK TREAD TUTORIAL" and immediately found the tutorial: http://www-viz.tamu.edu/courses/tutorials/hunter/presentation.htm
After reading through this tutorial weak points became immediately obvious to me. Although the basic idea is correct, the author suggests setting up each tread by hand. Also the setup is not reactive to the terrain underneath it so animating would be very difficult.
Step 1: Attach something to a path and learn the corresponding mel command.
• Start by making a simple curve in maya by going to CREATE> CV CURVE TOOL (or EP CURVE TOOL) The shape and size is not important because this is just to see how to do it once. We will write a script to do it for us later.
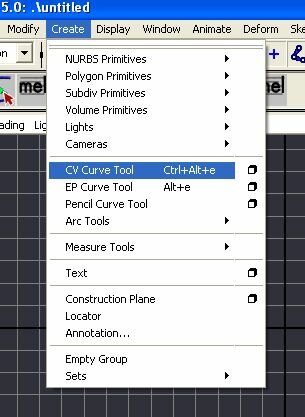
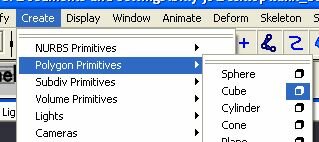
• Now make a polygon cube: CREATE > POLYGON PRIMITIVES > CUBE

• Open the script editor (bottom right corner of the command line) and watch it as we perform the following.
• Select the cube and then shift select the curve.
• Go to ANIMATE > MOTION PATHS > ATTACH TO MOTION PATH
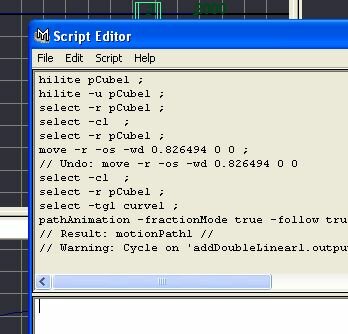
• The output returned will look something like this:
select -r pCube1 ;
select -tgl curve1 ;
pathAnimation -fractionMode true -follow true -followAxis x -upAxis y -worldUpType "vector" -worldUpVector 0 1 0 -inverseUp false -inverseFront false -bank false -startTimeU 1 -endTimeU 2000;
// Result: motionPath1 //
Notice that the result is motionpath1.Remember that Maya is a node based package Whenever you animate something with keyframes, expressions or motion paths Maya builds a node and connects it to the translate, rotate, or scale attributes of the transform node to be animated.The default name of the animcurve node driving the motion of our simple tread object is motionPath1.
To better illustrate this you could select the cube, instantiate the hypergraph , right click and graph > input and output connections. Sure enough there is our motionpath node driving in this case the rotations of our object.

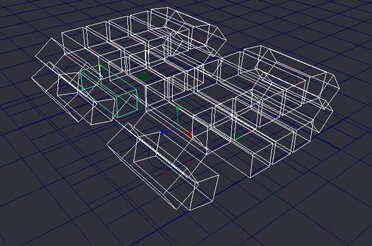
So we now know everything we need to know to set up a tank tread. The only other thing I will use is a wrap deformer, an extremely useful tool to make the geometry of one thing conform to the geometry of another, even when animated.
• The basic setup will be as follows: A NURBS patch that will slide over another nurbs terrain model with a wrap deformer to make it conform to the terrain. The curve for our treads will be wrapped to this patch which in turn is wrapped to the terrain model.
If you don't want to set-up the scene you can skip the following steps and use the included scene file below
Step Two: Make paths for treads to follow, and setup a NURBS patch to use as a deformer. This step is optional because the setup scene is included below.
To begin make a new Maya scene:
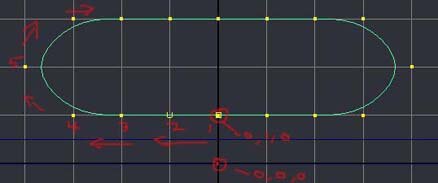
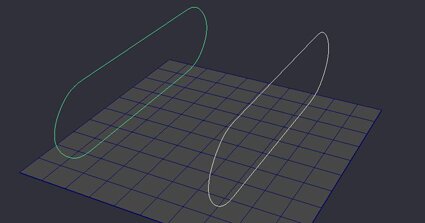
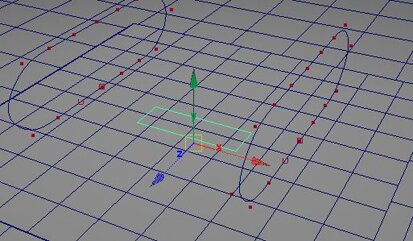
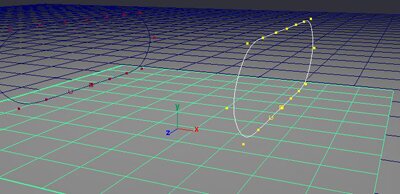
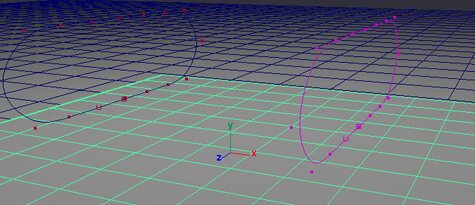
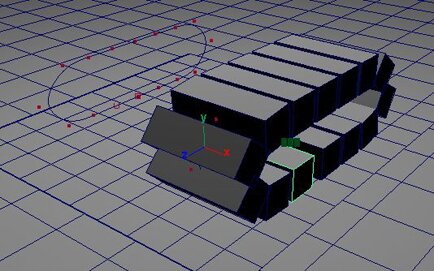
• First we need a curve to use as our tank tread path. Any NURBS curve will work as long as it ends on the point where it begins, but for consistency use the same dimensions as the curve below . switch to the X axis View and turn on the snapto grid.
 The snap to grid icon activated The snap to grid icon activated
• Start by clicking on the center point 0 1 0 and click 16 more points clockwise in this pattern. Notice that we are one grid unit above zero on Y because our control object will go between the ground and the tank tread on the Y axis.
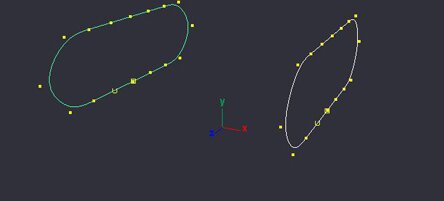
• Looking down the X axis orthographic view ...
... in the channel box move it to 3 on the X axis.Duplicate it and move the copy to -3 on the X axis for the other tread.
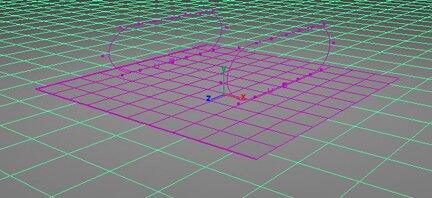
• Set the following values
width 11
length 11
U patches 10
V patches 10
• Rename it TANK in the channel box.
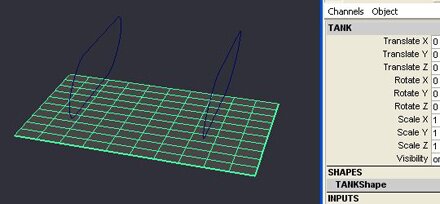
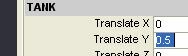
• Set the translate Y to .5 so it is not exactly on top of the terrain model we will use.This will become the "handle" for our tank object. This will be the object that drives our tank
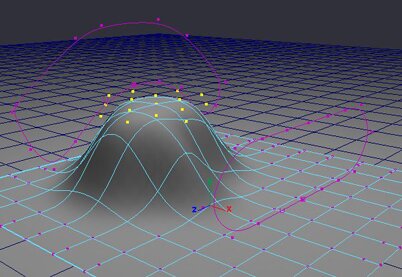
• Now make another NURBS plane.CREATE > NURBS PRIMITIVES > PLANE OPTIONS
width 100
length 100
U patches 50
V patches 50
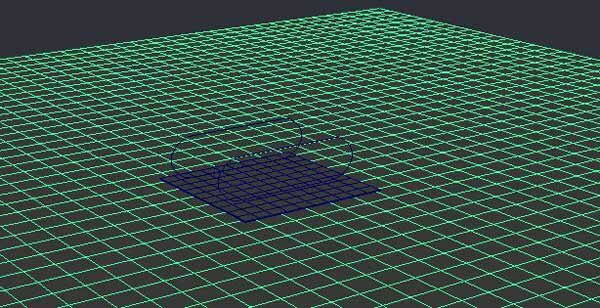
This is our ground model.We want a lot of patches so we can deform it later and get nice bumps in it.
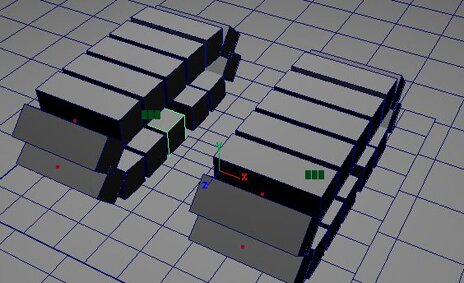
• The Tread. Now all we need is a tread object .To make our tread object open the polygon cube creation options window by going to CREATE > POLYGON PRIMITVES > CUBE options
• Set the options to these values
Width 2
Height .5
Depth 1
Click apply
We can just see the top of it because it is created at the center of our world. This is fine because we never actually use this object, we will duplicate it N number of times and attach the duplicates to the curves with our script.
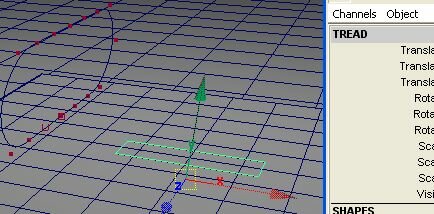
• Rename it TREAD
Step Three: Attach curves to a NURBS patch, attach the patch to a terrain model using a wrap deformer. Note:If you skipped the above steps and want to use the included setup scene click HERE
From here on you have to make sure your history is ON. Wrap deformers use history and will not work without it. Make sure the scroll icon at the top of the screen does not have a red x on it.
• This is off, we want it ON.

• This is on.

• If you haven't already, switch to the animation toolset by hitting f2
• Select the curve1 object first then shift select the TANK nurbs plane object.They must be selected in the right order to make sure TANK drives curve1.
• Wrap the curve to TANK by going to DEFORM>CREATE WRAP. Remember this will not work if history is off.
• Now when TANK is selected, Maya makes the curve purple to indicate that there is a downstream relationship from TANK to curve1
• Repeat the last step making a wrap for the other curve, first selecting the curve, then TANK, then wrapping.
If we were to deform TANK at this point the curves will follow along. Now we can see where this is going. One last step for this part before we write a simple script.
• Select the TANK nurbs plane and then select the terrain object (the big NURBS plane on the bottom ) and create one more wrap.
Step Four: Write a few mel procedures to determine upstream animation nodes and set the cycles to loop .
Fortunately the good folks at Alias have given us the means to do repetitive tasks very easily with the power of mel scripting. The approach I will use is to follow the basic idea of using a path curve to attach the treads to, but I am going to use a simple script to do the tedious work for me. I also have added in two wrap deformers to make the treads adhere to a terrain model underneath the treads.
Basically we are going to use a procedure to duplicate a specified tread object over and over and attach it to an animation path with an offset over time so they are not all on top of each other as they traverse the path curve.
• I am going to now introduce the concept of a procedure.We know from our last tutorial that mel commands can be entered into the script console at any time to aid in our workflow. A procedure is simply a group of commands that is defined with a name to call it.The format for a procedure is: proc myproc ( arguments ) { some commands };
- proc // tells maya to create a procedure
- (arguments ) // arguments are instructions passed into the procedure
I also like to declare my procedures as global,which will make the script source able from a location anywhere on your hard drive.
This procedure may seem complicated at first but it really is simple. All it is doing is duplicating a specified tread object, $treadObj, N number of times and attaching it to a path, $curveToUse, at incrementing start and end times. The numbers 14,100,and 7 are set to work for this example. If you use your own treads and curves the three variables $numberOfTreads, $numberOfFrames,and $offset will need to be adjusted.
|
//this duplicates a tread object and offsets the timing cycles for a path
//number of treads sets the number of duplicated objects
//number of frames is the timing of each cycle
global proc buildTankTreads (string $treadObj, string $curveToUse )
{
select -cl; //clear selection list in case something is selected
int $numberOfTreads = 14; // sets how many times will we duplictae $treadObj
int $numberOfFrames = 100;//sets how long should one rotation take in frames
float $offset = 7;//essentially sets the width of each tread , or how closely the treads are put together on the curve
for ($a=0;$a<($numberOfTreads*$offset);$a=$a+$offset)
{
string $duper[] = `duplicate $treadObj`;// make a duplicate of $treadObj
select $duper[0];
select -add $curveToUse; //select the curve to attach it to
pathAnimation -fractionMode true -follow true -followAxis z -upAxis y
-worldUpType "vector" -worldUpVector 0 1 0 -inverseUp false
-inverseFront false -bank false -startTimeU $a -endTimeU ($a+$numberOfFrames);//this is what does all the work
}//end loop
}//end proc buildtankTreads
|
The 3 variables $numberOfTreads, $numberOfFrames,and $offset control the timing and spacing of the tread. In this example there is still a small gap but you will get the idea. You could tweak the offset variable to get a better fit. The numbers 14, 100 and 7 were good for purposes of this exercise.
• To procedurally build our tread just run the build TankTreads function twice, once for each curve
• To run the function source it in and type in the script editor window: buildTankTreads TREAD curve1 for the first curve.
then run it for the other curve now
buildTankTreads TREAD curve2
If you play the animation now the treads will follow the curve but they will only go around once and stop, we can fix this with three simple steps.
This seems like overkill but The only way I could figure out how to set the cycles for each tread was to use three more functions. One to get a animcurve node for a given transform. One to set the cycle, and one to trigger the other two scripts for each selected item.
• Paste in the following scripts and hit enter on the numeric keypad. This procedure looks upstream for a transform nodes rotate order to determine which node is driving the animation
//this returns the animcurve node driving the input of a transform
global proc string getAnimCurvFromXform (string $xform)
{
string $buffer;
string $attributeToCheck = ($xform +".rotateOrder");
if (`connectionInfo -id $attributeToCheck`)//only perform operation if $attributeToCheck is connected
{
$buffer = `connectionInfo -sfd $attributeToCheck`;//returns name of input to $attributeToCheck
}
string $bufferArray[];
tokenize $buffer "." $bufferArray;
return $bufferArray[0];
} |
• This procedure will set an animation curve to cycle pre and post infinity. This is not to be confused with the path curve, this is a curve that drives the channels for each tread. This can be found in the animation editors> graph editor when the transform is selected.
|
//this makes a curve cycle pre and post infinity
global proc makeCycle (string $animCurve)
{
selectKey ($animCurve ) ;
setInfinity -pri cycle;
setInfinity -poi cycle;
}
|
• This just launches the above two procedures for each selected item. Notice the similarity to the first venetian blind control tutorial
|
//this is a simple proc to run makecycle on all selected items
global proc makeSelectedCycle ()
{
string $ls[] = `ls -sl`;
int $size = `size($ls)`;
for ($a=0;$a<$size;$a++)
{
$treadObj = $ls[$a];
string $animCurveName = `getAnimCurvFromXform $treadObj`;
if (`size($animCurveName)`)makeCycle $animCurveName;
}
}
|
• We don't need the original TREAD anymore so get rid it by running the command: delete TREAD; There may be an additional tread at the center of the world also, If there is delete it also. We only want the treads attached to the curves.
• Select ONLY the tread objects by filtering your selection to polygons and box select all the tread objects.It is important to only select the treads because the following script works on whatever is selected.
• To set the cycling on the selected treads just type: makeSelectedCycle;
All we have to do now is to key frame our TANK object moving over the terrain. To make things more interesting move some points of the terrain to put some bumps in it. The treads will follow along.
And we are DONE!!!!
One annoying thing with this setup is that the treads may flip when they go around the curve at the ends and then flip back. See if you can figure out how to write a script that will fix it. Here is a hint, iterate through selected things and apply an orient constraint to them like we did in the first tutorial.
To see a finished example scene (with the flipping problem unfixed) click HERE.
Modified: 1-30-04
|
